
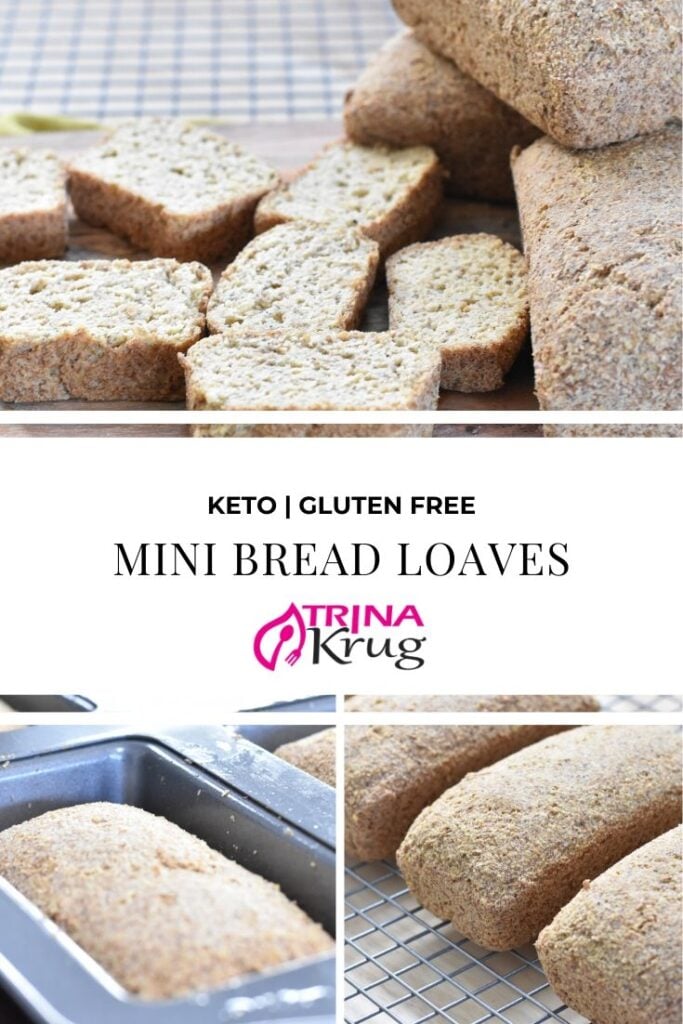
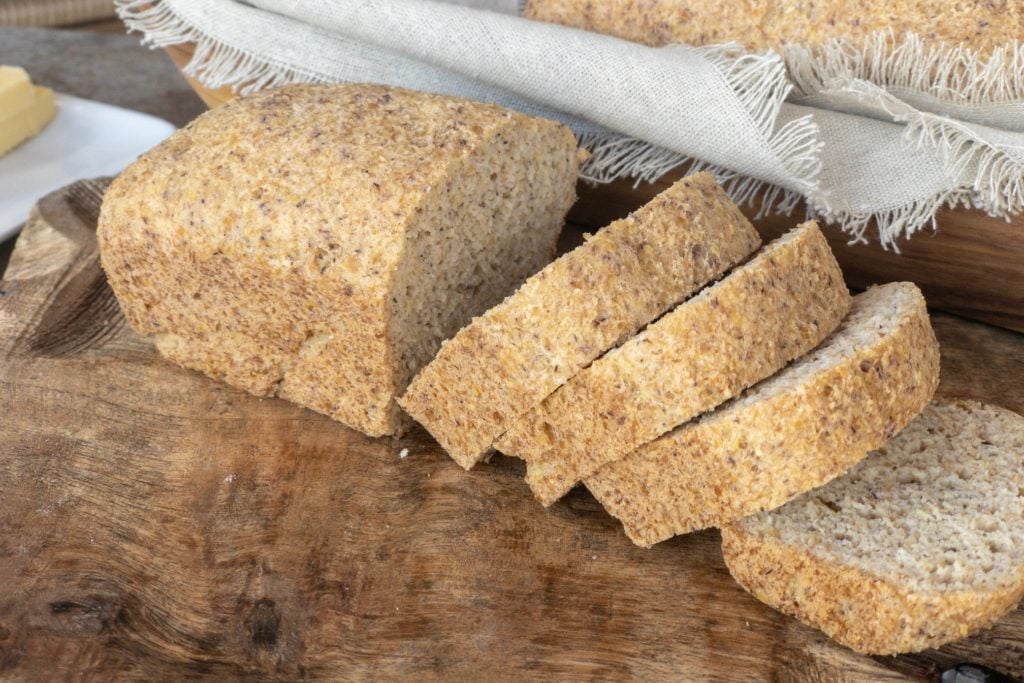
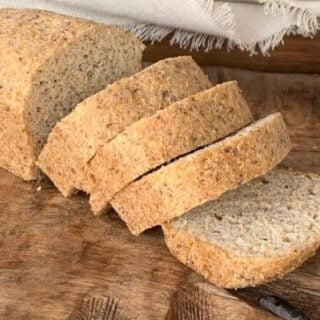
These Keto Mini Bread Loaves are small, yet mighty in taste! Not eggy, totally toastable, freezable, and delicious!
This post may contain affiliate links. As an Amazon Associate, I earn from qualifying purchases. See Disclaimer.

Keto Mini Bread Loaves
I can honestly tell you that if you had asked me a year ago if I could make bread or thought I’d ever be able to, the answer would have been NO to both.
I’ve become quite the keto baker this past year and I decided it was time to try.
I already had an amazing keto buns recipe and could use that as a base.
CLICK to Sign up for FREE Keto Recipes Direct to Your INBOX!

I simply needed to make them a touch denser and if the loaf formed while baking (I was nervous), then they would be perfect. And I was right, this low carb loaf bread DID turn out perfect!
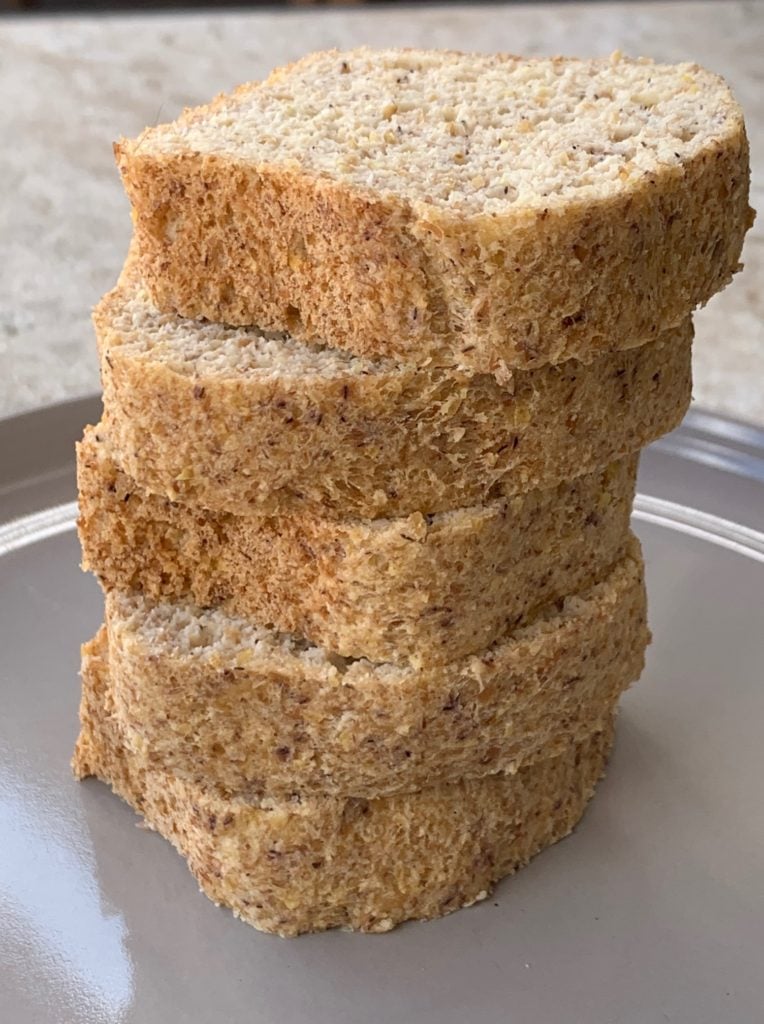
The true test, however, is my kids. I cut one of the mini bread loaves up and left it on the counter.
They got home from school when I wasn’t home and by the time I got home, it was gone. My 16 year asked what was that great bread on the counter. My 13 year old hadn’t tried it yet and asked for a piece.
I told him that he might want to put something on it. He took it, shoved it in his mouth and said “THIS IS AMAZING – I just want it plain!” He grabbed another piece and held it while he was still stuffing the first piece in his mouth.
Alrighty then. Test passed.
I already knew it was phenomenal, but they are the final hurdle. If a recipe doesn’t pass their test, it doesn’t get published. Period. My recipes are family approved and I stand behind that!
RELATED – How to Eat Keto When Your Family Doesn’t (Hint – IT IS EASY)
How to Make Keto Bread
Preheat oven to 350 degrees.
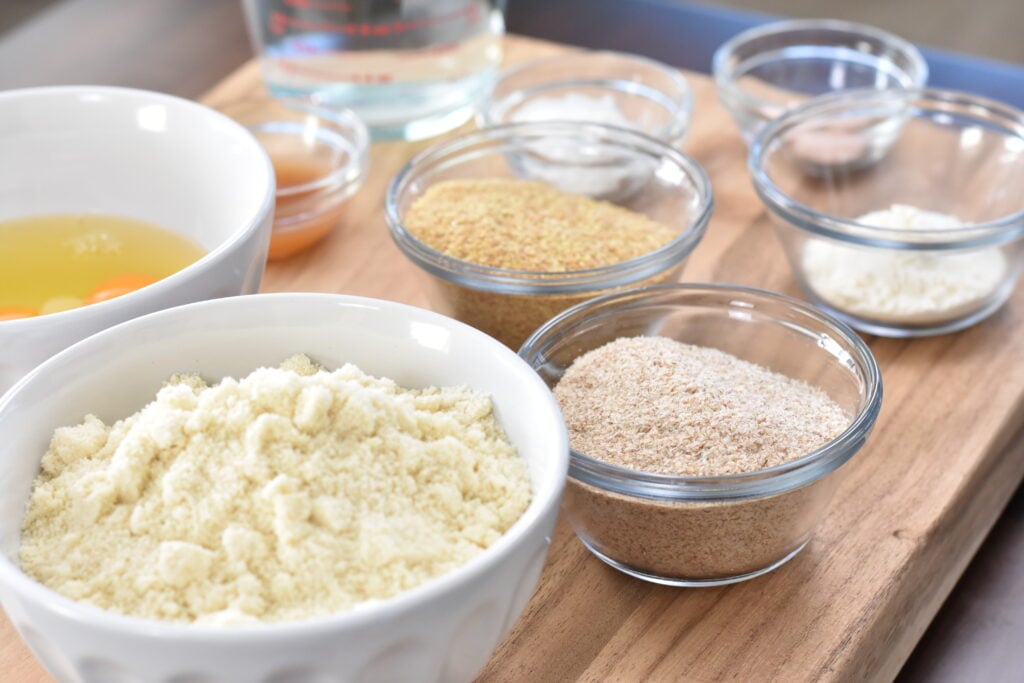
Mix the almond flour, coconut flour, psyllium husk, flax, sea salt, and baking powder in a medium bowl.
Meanwhile, boil the water.
In a small bowl beat the eggs whites, eggs and vinegar lightly (just quick enough to combine it all). Add the eggs and vinegar mixture into the bowl with the dry ingredients. Mix with a hand whisk for about 20-30 seconds.
Add the hot water and whisk for another 30 seconds. Then use your hand (be careful, it will still be hot) and mix for another 10 seconds using a folding motion. The dough will get more “doughy” as you do this.
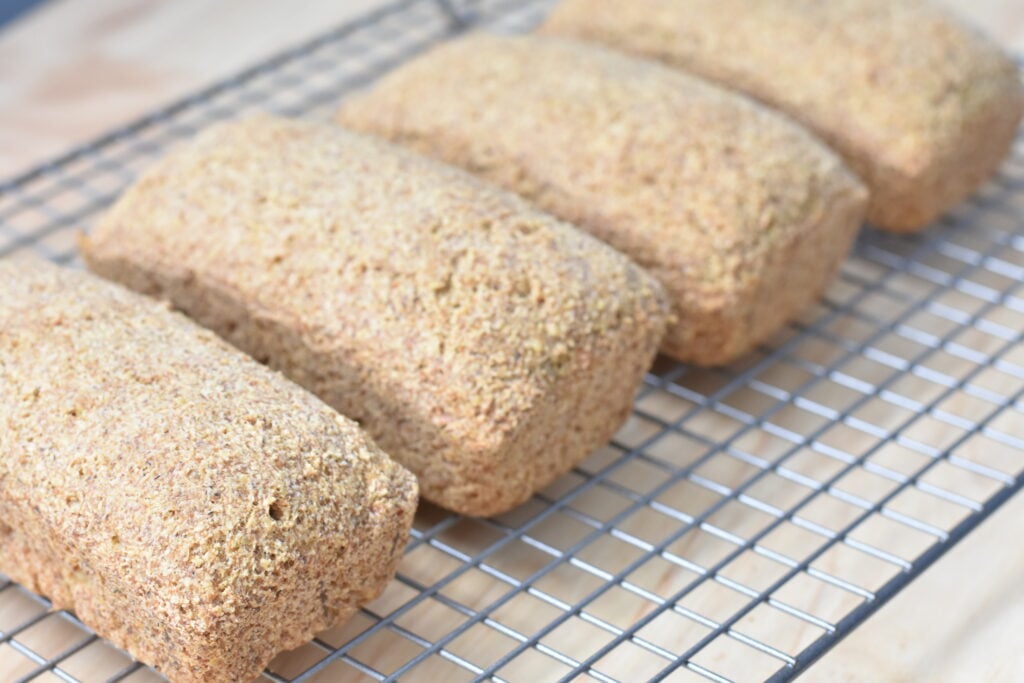
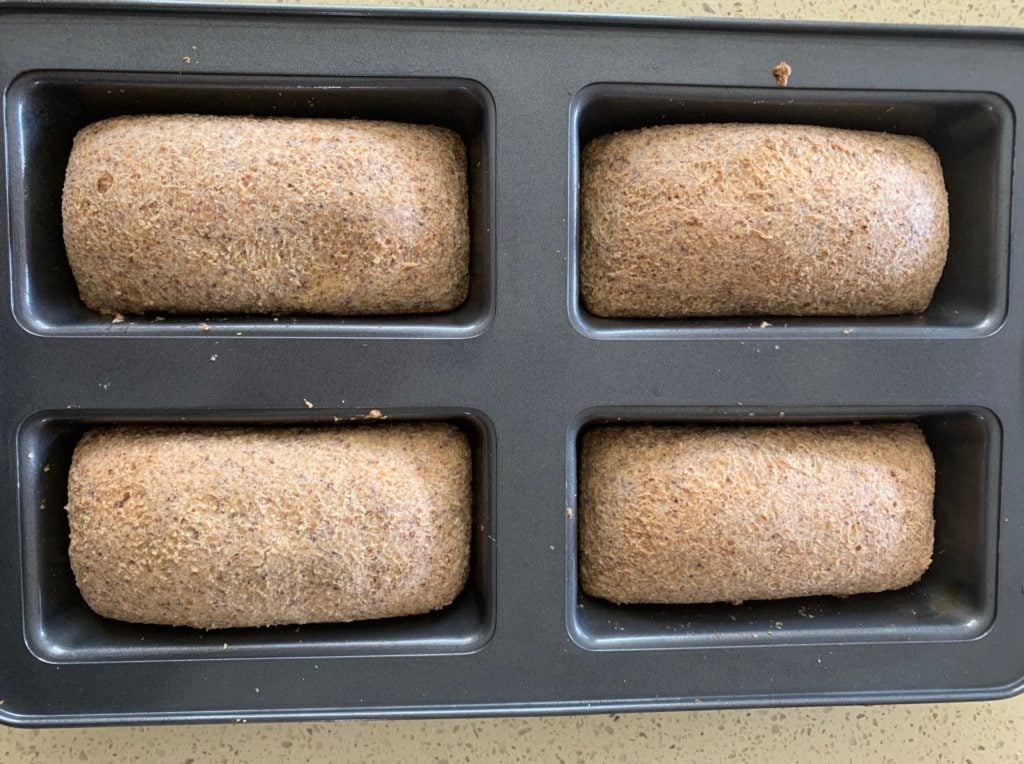
Since your hands will already be goopy, just scoop it equally into the 4 mini loaf molds. Smooth out the top a bit, but it doesn’t need to be perfect. Bake for 50-55 minutes and remove from oven.

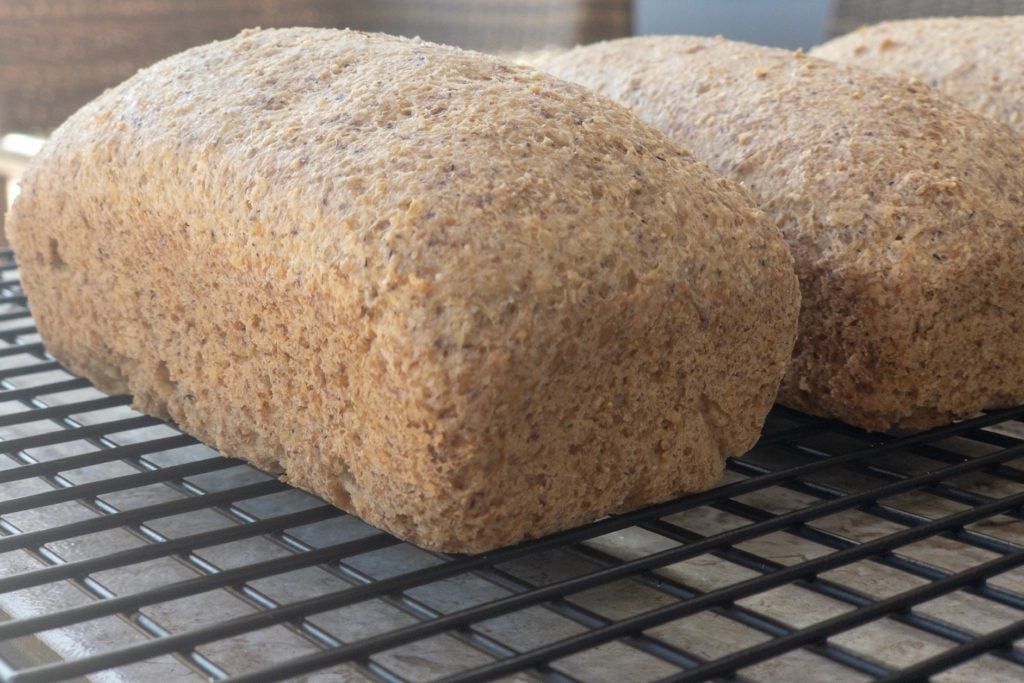
While they are still hot, remove from loaf pan. You can use a knife or thin spatula to separate the sides and then pop it out.
Let cool on a wire rack.
Ingredient Choices for Keto Bread
I chose to make the base almond flour. My preference for bread is always almond flour over coconut flour since it allows for dishes to be fluffier.
I did add a few tablespoons of coconut flour in order to make it just a tad denser than what my keto buns are.
Coconut flour is known for its denseness and ability to suck up liquid. So since I added some coconut flour, I had to increase the liquid ratio as well.
I also chose to use flax and psyllium husk.
Psyllium is awesome for holding the bread together. I LOVE psyllium husk! Oh, and all y’all out there that are suffering from keto constipation will be happy to know that psyllium will help move things along.
As for flax, it is also high in fiber and really helps the bread swell up a bit.
Baking powder and Apple Cider Vinegar will also give this bread some lift.
My focus was a fluffy bread that was NOT airy and had some denseness to it. I nailed it. I won’t be humble on this one! Because, well, I absolutely DID nail it!
Keto Bread Kitchen Essentials
Mini Loaf Pan – You’ll definitely need a mini loaf pan!
My next venture will be a single larger loaf but that will need some interesting modifications. I’ll accept that challenge. But for now, make mini loaves and have some fun with it!
Silicone Whisk – I prefer to use a whisk over a spatula as it allows the dough to pass through it and it doesn’t mash it.
Tips
I have a few tips to make this bread the most outstanding possible!
Tip #1 – Use your hands to do the final folding. It will be hot, so be careful.
Just open up your fingers and do a folding motion just like you would use a spatula. Let it flow through your fingers.
After about 15 seconds, you’ll see the dough thicken up.
Tip #2 – Once you have the dough in the molds, press down around the outside edge of each loaf.
That way the center rises higher and will resemble a loaf of bread. That is part of the fun, right? Having something that LOOKS like bread as well as TASTES like bread?
Tip #3 – The size of my mini loaves were about 5.5 x 3.
How to Store Keto Bread
I did a bunch of experiments because I make these so often! Here is what I learned:
- Always store them in an airtight container
- If you put them in the airtight container before they are cooled down, condensation can occur on the inside – especially if it is a ziplock bag. Which is no big deal, but still…
- These will last a few days on the counter (fresh stuff always goes first)
- They last way longer in the fridge (longest we’ve had them without using them is 1 week)
- Glass is better than plastic ziplock bags.
So, the BEST way to store them is in a glass container in the fridge. BUT you can just as easily use a ziplock (which I do half the time)
Other Bread Recipes You Might Like
Keto Mini Bread Loaves
Equipment
Ingredients
- 2 cups almond flour
- 1/2 cup psyllium husk powder
- 1/2 cup ground flax
- 4 teaspoons baking powder
- 2 tablespoons coconut flour
- 2 teaspoons Pink Himalayan sea salt
- 5 teaspoons Apple Cider Vinegar
- 1 3/4 cups boiling water
- 4 egg whites
- 2 eggs
Instructions
- Preheat oven to 350 degrees.
- Mix the almond flour, coconut flour, psyllium husk, flax, sea salt, and baking powder in a medium bowl.
- Meanwhile, boil the water.
- In a small bowl beat the eggs whites, eggs and vinegar lightly (just quick enough to combine it all).
- Add the eggs and vinegar mixture into the bowl with the dry ingredients. Mix with a hand whisk for about 20-30 seconds.
- Add the hot water and whisk for another 30 seconds. Then use your hand (be careful, it will still be hot) and mix for another 10 seconds using a folding motion. The dough will get more "doughy" as you do this.
- Since your hands will already be goopy, just scoop it equally into the 4 mini loaf molds.
- Smooth out the top a bit, but it doesn’t need to be perfect.
- Bake for 50-55 minutes and remove from oven.
- While they are still hot, remove from loaf pan. You can use a knife or thin spatula to separate the sides and then pop it out.
- Let cool on a wire rack.
Video
Nutrition
Trina Krug is a Holistic Nutritionist, Integrative Health Coach and host of the Beyond Blood Sugar Podcast. With a Master’s Degree in Integrative Health, her single mission in life is to facilitate self-healing in herself and those around her through awareness, lifestyle shifts and low-carb eating. As a current Doctor of Science student, she continues her studies in functional nutrition.
IS THERE ANYWAY I CAN DO A EGG SUBSTITUTE LIKE CHIA OR FLAX OR GELATIN FOR THIS RECIPE?.
Good question! Often you can substitute flax and water (which I’m sure you already know), but given there is already a considerable amount of flax in here, I’m not sure that would work. I have never tried gelatin, although that is on my list to try. In short, I am not sure about those substitutes 🙁
Can i just use 4 eggs total
I imagine the taste might be a bit eggy. I don’t like eggy bread, so removing the yolks prevents that!
Is there any type of keto recipe out there for a brown bread with flax, chia seeds and anything else with no coconut flour? Also without the vinegar?
I imagine there!
Can I use a normal size loaf pan? I don’t have mini.
Not for this recipe! This is meant for the mini loaves.
i use a 9×5 loaf pan
after one hour i poke it in the middle with a knife and bake another hour. perfect every time
WHAT???? I’ve never tried it that way! Totally trying this!
This is an interesting looking bread recipe. Could you elaborate on the “mini” loaf pan? Loaf pans, even mini pans, come in many sizes. What size loaves are you making here? Thank you.
They are the ones that come 4 to a pan. They are approximately 5.5 in x 3 in! Thanks for asking!
So, for 32 servings, you cut each loaf into 8 slices, right? That math was making me mad for minute, until I figured it out. I thought you were saying that one mini loaf had 32 slices!
Yes! Each load is 8 slices. I try not to assume how many slices people will eat, so I make the “servings” size 1 and then you go from there! But, yes, 8 slices per loaf, 4 loaves = 32 servings!
Looks great, sounds great.. Could I use ground hemp in place of flax?
Oooh! Good question! I have not cooked with hemp but would love to know if it works for you!
Hemp was a fail.. Once ground it became pasty and bread came out flat… I cut it up and tossed it in my dehydrator and made bread crumbs. Just took 2 try out it feels heavy and I forgot to push the sides down so is flat on top. Fi gers crossed.
Hi
I don’t have a mini loaf pan. Do you have a recipe for a full loaf pan?
Thanks
Not yet – but hopefully soon!
I only have 2 mini loaf pans. What kinds of tweaks would you suggest to make one regular size loaf? Also would this work for sandwiches or is it to heavy?
I have not worked out the recipe for a larger loaf. It will need some tweaks, i know that. I use these to make mini sandwiches for my kiddos and they love them!
I just made the bread and it’s fantastic. Question: How should the loaves be stored?
So happy! I took a moment and updated the recipe to answer this question! You can hit refresh on it for the long answer. But the short answer is that they will last a few days on the counter, longer in the fridge. And they do freeze well. Glass is better than plastic for storage, but either works!
Pingback: Keto Cheddar Focaccia | Explorer Momma
Pingback: Sugar Free Blueberry Sauce | Easy Recipe With Cinnamon
CAn I substitute regular vinegar instead of apple cider ?!
I’ve never tried! You should be able to, but there will be a taste difference and I *think* apple cider vinegar is a bit more acidic which factors in as well.
I wish you had metric amounts also. I live in USA, but bake with my scale. Much quicker to bake, and far less. cleanup.
Thank you for your feedback! I do hope to add this feature into my recipe cards very soon! Stay tuned!
Can you use liquid egg whites from a carton or do they need to be from separated eggs? Anxious to try this as soon as I get some mini loaf pans. Looks awesome.
I imagine you could use the equivalent liquid egg whites from a carton. I haven’t tried it, but I don’t see why not.
Pingback: Pita Bread { Low Carb | Keto | GF } | The Keto Option - Keto The Healthy Way
I made this bread this morning and it is fantastic. It has a good texture and taste. In fact, for lunch today I made mini grilled cheese sandwiches with it. Will make sure I have some of this available all the time!!! Great recipe.
Fantastic!!!
This bread is fantastic! I can’t tell you how recipes I have tried. Nothing compares! Too bad the loaves are so tiny.
Consider cutting the loaves wide instead of short. You will get a larger piece that way
Turned out perfectly!
Fantastic!
I am new to bread making and have just started on a gluten free diet. I have tried other recipes and will continue to experiment until I find a gluten free bread I really like. I made this recipe today using with two smaller pans with the same capacity of the 4 mini loaves. I baked it in my convention oven at 350 for 55 minutes and it rose nicely, though, when I removed it from the pans it collapsed to half its size. When the bread cooled and I cut slice, it were very moist, almost doughy inside. The bread did have a nice flavor. It was bit too salty, probably because I used sea salt instead of pink salt. I have two mini loaf pans that are 5.5 x 3 so I will try cutting the recipe in half and see what happens next time. Any suggestions would be greatly appreciated though. Thanks for your contribution to gluten free baking!
This recipe is meant for 4 mini loaves. It is not formulated for larger loaves. The center will not get done (as you found). I am working on a full size loaf recipe and can let you know when it is ready! In the meantime, stick with the small loaf pans and they will cook perfectly!
I’d love to see those tweaks too. I also did a full size loaf and it collapsed and was doughy in the middle. 🙁
Yep – this recipe is NOT for a full loaf! It’s funny how much more fickle a full loaf is! Use the mini loaves and you will be pleased!
Could I use aluminum mini pans
Yep!
Can this be made in a bread machine?
I have never tried it!
Can i use gluten free flour in place of the almond flour?
That would change quite a bit of the consistency and moisture balance perhaps. You can definitely do that, but other things may need to be adjusted as well!
This bread was awesome! Can’t wait for the larger size loaf recipe!
So glad to hear!!!
I tried the bread an it taste great, I did use a whisk but when I added the eggs everything clumped in the whisk. Next time I think I will just use a spatula. Thank you so much Trina for your recipes.
Yep it does that, but as soon as you add the water it all comes out easily! A spatula will work too though!
So strange, I’ve made this recipe twice now. First time I was out of psyllium husk powder so I used the whole and just ground it in my coffee grinder. Looked just like yours, soft, fluffy and golden. I made it this time using Yerba psyllium powder and the loaves baked up a chocolate brown. The batter seemed thicker before baking which might have been why the texture is also different, much denser. The taste is the same. Any clues what happened?
Some Psyllium Powders change the color of the bread. Usually, it is almost a purple color. I have never used any of the psyllium that this happens with luckily, but it does happen. I would try another psyllium OR stick with grinding them up yourself if that worked well.
What are your thoughts on using a stand mixer with a dough hook?
Haven’t tried it, but I imagine it would work just fine!
You did nail it! I followed it to a T and got 4 perfect little loaves!! Thanks!!
You are so welcome!
Can you freeze the loaves for later use?
You definitely can! I freeze them all the time!
I know this post is many years old however I tried it today with a couple of twists. I used 1/2 cup of carton egg whites instead of 4 egg whites and I used individual mini loaf pans in my AIR FRYER cuz that’s all I have! 340 deg for 40 minutes . I used an instant read thermometer to figure out the timing – at 200 deg internal temp I removed them from the AF and the pans. They were perfect and tasted like my favorite whole wheat bread. Watch the carbs tho…don’t get carried away.
It is an oldie but a goodie for sure! I love reading comments like this! Thank you!