

Mini Keto Santa Cheesecakes bring a playful holiday twist to a classic low-carb dessert. With a buttery almond flour crust and a smooth, creamy cheesecake filling, each bite feels rich and indulgent without being overly heavy. Topped with a strawberry Santa hat and a few festive keto marshmallows, these tiny treats instantly brighten a dessert table and add a fun, seasonal touch to any gathering.

What Makes These Santa Cheesecakes So Festive
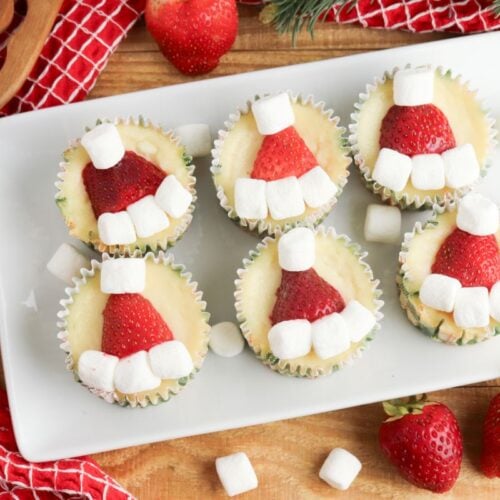
The magic of this recipe is in the presentation. A simple strawberry transforms each cheesecake into a mini Santa, making them perfect for holiday parties, cookie platters, or kid-friendly baking projects.
They look impressive but take far less effort than most holiday desserts, which is always a welcome bonus this time of year. Because they are baked in individual cups, they’re also ideal for sharing, transporting, or making ahead of time.

Tips for Perfect Texture and Easy Decorating
For the creamiest cheesecake, allow the filling ingredients to come fully to room temperature before mixing. A gentle water bath in the oven helps the cheesecakes bake evenly and prevents cracks. When decorating, choose strawberries that are similar in size so each Santa hat looks uniform. Mini keto marshmallows add the perfect snowy trim, but a bit of whipped cream can be used in a pinch if you need a little extra stickiness.
How to Toast Almond Flour for a Better Crust
Toasted almond flour adds a deeper, warmer flavor to the crust and gives these mini cheesecakes a subtle nutty richness you don’t get from raw flour. It also makes the crust more aromatic and slightly crisp, which works beautifully with the creamy cheesecake layer. If you’ve never toasted almond flour before, it’s quick, simple, and absolutely worth the extra few minutes.
To toast almond flour, spread it out in a thin, even layer on a dry skillet or baking sheet. Warm it over medium-low heat while stirring often to prevent burning. Once the flour turns lightly golden and smells fragrant, remove it from the heat immediately and let it cool before using. The color changes fast, so keep a close eye on it. Perfectly toasted almond flour should be golden, not brown.

Substitutions That Still Keep These Cheesecakes Keto
You can adjust a few elements without changing the spirit of the recipe.
• Substitute mascarpone for a slightly richer, silkier cheesecake base.
• Use pecan or walnut meal instead of almond flour for a deeper crust flavor.
• Swap the sweetener for any preferred keto-friendly option.
These small changes let you tailor the recipe while keeping it fully low-carb and holiday-ready.

How to Store These Mini Cheesecakes
Once chilled, these hold their shape beautifully. Keep them in an airtight container in the refrigerator for up to three days. For best results, decorate with strawberries and marshmallows shortly before serving so the Santa hats stay bright and fresh. They also freeze well without the strawberry, giving you an easy head start on holiday prep.
Mini Keto Santa Cheesecakes
Ingredients
For the Crust:
- 1 cup toasted almond flour
- 4 tablespoons butter melted
- 2 tablespoons low-carb granular sweetener
For the Cheesecake:
- 16 ounces cream cheese softened
- 1/4 cup sour cream
- 1/2 cup low-carb granular sweetener
- 2 eggs
- 1 teaspoon vanilla extract
For the Topping
- 6 large strawberries
- Mini keto marshmallows
Instructions
- Preheat the oven to 350°F and line a 12-cup muffin pan with paper liners.
- Mix together the crust ingredients until the mixture begins to clump.
- Add a heaping tablespoon of crust to each cup and press it firmly into place.
- Bake 5–6 minutes, until lightly golden.
- While crusts bake, bring a pot of water to a boil for a steam bath.
- Beat the cream cheese, sour cream, and sweetener until smooth and creamy.
- Add the eggs one at a time, mixing between each addition, then add the vanilla.
- Divide the cheesecake filling evenly among the muffin cups.
- Pour the boiling water into a 9×13 dish on the lower rack of the oven, then add the muffin pan to the center rack and close the oven promptly.
- Bake for about 20 minutes, until the edges are set but the centers still jiggle slightly.
- Cool to room temperature, then chill for at least two hours.
- When ready to decorate, slice the tops off the strawberries and cut them in half.
- Press a strawberry onto each cheesecake and decorate the hat with mini marshmallows.
Nutrition
Trina Krug is a Holistic Nutritionist, Integrative Health Coach and host of the Beyond Blood Sugar Podcast. With a Master’s Degree in Integrative Health, her single mission in life is to facilitate self-healing in herself and those around her through awareness, lifestyle shifts and low-carb eating. As a current Doctor of Science student, she continues her studies in functional nutrition.